Enhanced data exchange with GSA |
  
|
Enhanced data exchange with GSA |
|
By combining the functionality of the GsRevit link and the ExcelLink it is possible to extract more data out of GSA and include it within the Revit model.
The aim is to produce drawings form the Revit model which include analysis data such as axial forces and reactions from GSA.
This is an 'in development' workflow, so this documentation is subject to change. Thanks to Eric Borchers, Matt Clark, David Easter and others for this workflow / documentation.
This documentation was taken from the X-Wiki page GSA to Revit Link - with enhanced metadata capabilities
This workflow requires:
•Revit Structural (tested with 2011)
•CADtools Revit (0.5 or later)
•GSA 8.5.1.19
1.Import your GSA model into Revit using the GsRevit link. (Refer to the GSA documentation or this X-Wiki page for more details)
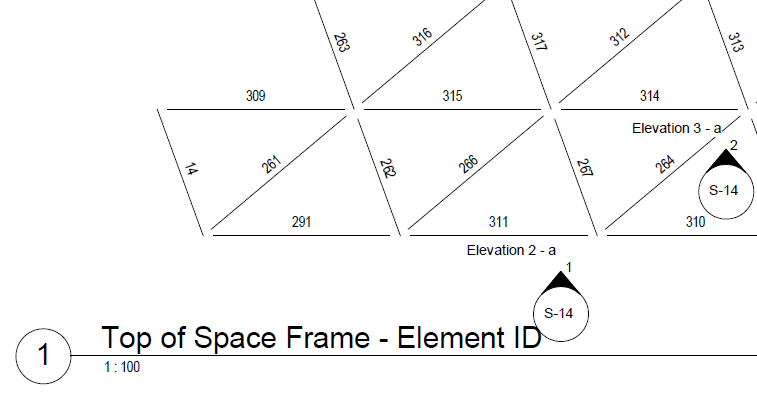
2.The "Comments" parameter on the imported Revit members will contain either the GSA element or member ID (according to which layer was imported).
3.Using the "Comments" parameter as the common identifier for elements between GSA and Revit, virtually any data from GSA can be passed to a Revit parameter using the CADtools Revit ExcelLink.
Note: In future the GsRevit link may be updated to use a specific parameter, rather than the generic 'Comments' parameter.
This section outlines in a little more detail how to create a framing plan that shows the maximum tension and compression in each member of a space frame. An intermediate-level familiarity with Revit is assumed.
1. Prepare for export.
Refer to the X-Wiki for some notes on preparing GSA for export and preparing Revit model for import.
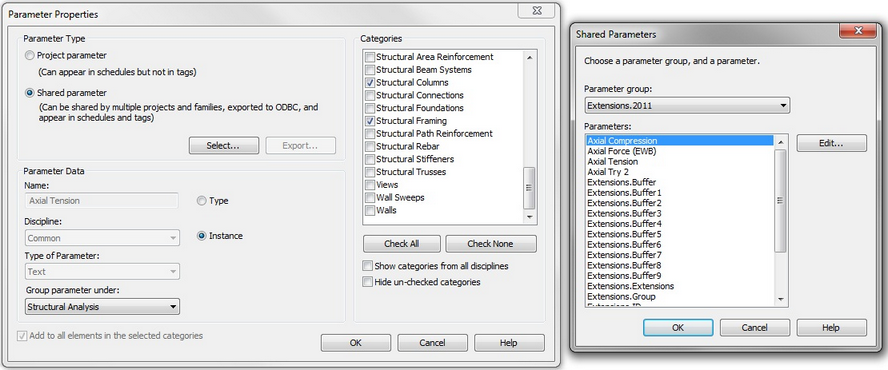
2. Create Project Parameters
In Revit, set up Shared Parameters for "Axial Compression" and "Axial Tension" as text parameters for structural framing (Manage -> Shared Parameters -> New). Defining these as text parameters is recommended, as it allows greater control over the final appearance in Revit
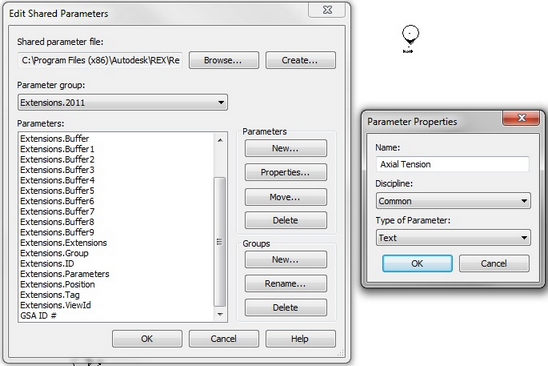
Assign these Shared Parameters as Project Parameters grouped under "Structural Analysis" (Manage -> Project Parameters -> Add).
3. Import the GSA model into Revit
Refer to GSA to Revit Link for more helpful notes.
Once imported the framing members or column, will have their "Comments" parameter has been populated with the GSA element or member ID
(screenshot?)
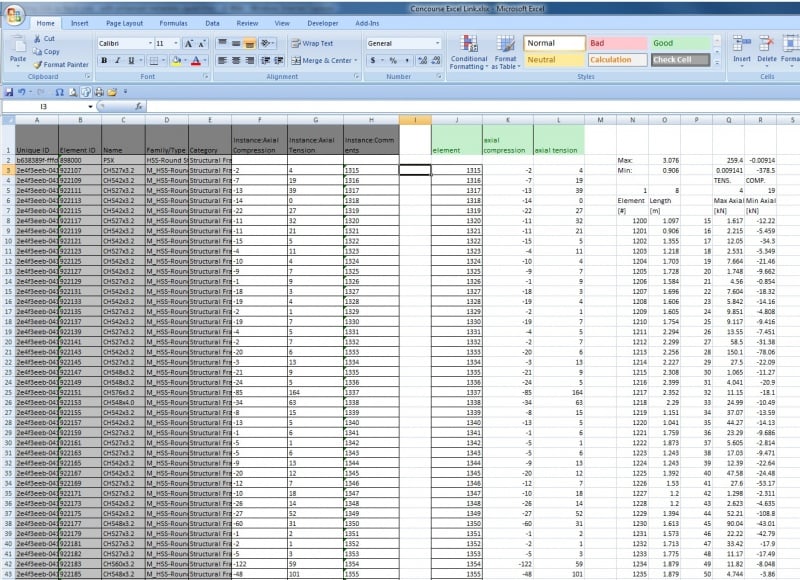
4. Link the Revit parameters to Excel data
Send project parameters "Comments," "Axial Compression," and "Axial Tension" to Excel using the ExcelLink.
Open the designated Excel file, and update the values of tension and compression using VLOOKUP skills. You will need to do some calculations on the side and paste the final values as text into the appropriate cells.
Note: The values must be pasted into the blank columns that were exported via the ExcelLink. Using a formula to reference other cells on the spreadsheet will not work.
You can sort the rows exported by the ExcelLink although care must be taken to sort all columns at the same time, otherwise values will end up associated with the wrong Revit element ID.
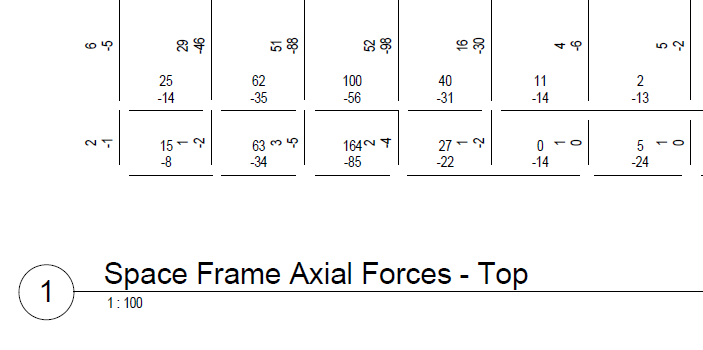
5. Display the data in Revit
There are many ways the data could be used once it is hosted in the Revit model, one example is as follows:
Load a structural framing tag that displays the values of the "Axial Compression" and "Axial Tension" parameters. One sample Revit framing tag family is available here .
Once the family is loaded, create framing plans and tag elements with the special structural framing tag.
Another example would be to display the "Comments" parameter which contains the GSA element ID.
Direct link to this topic:
© 2015 Arup