Link Revit to Excel |
  
|
Link Revit to Excel |
|
This command will enable you to create links between Revit parameters and Excel files. CADtools Revit will then keep the ‘linked’ Excel files up to date as changes are made in the Revit model.
This is in contrast to the in-built Excel export tools where the user must setup the export each time, and the Excel file becomes a disconnected copy of data. Once an Excel file is ‘linked’ using this method, CADtools Revit will automatically re-export the information to the same Excel file, at appropriate times such as when the file is saved, or when you manually re-export.
This allows Revit modellers and designers/engineers to ‘share’ and Excel file so the engineers always have up to date information for their calculations.
1.Link to an Excel file
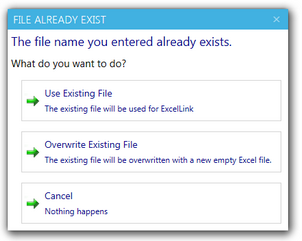
Click the 'New Excel' button to create a link to an Excel file.
![]()
Note: If you select an existing Excel file, you have the option to use that file as it is (Use Existing File) or replace it with a new empty Excel file (Overwrite Existing File)
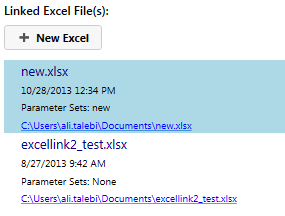
There can be multiple Excel files linked to the Revit model. The location of the linked Excel file is displayed below the selection list.
As you hover over a link item, you would see the buttons to:
•import
•export
•re-browse to a new Excel file location (e.g. if the file is missing because the directory structures changed)
•or unlink that Excel file
![]()
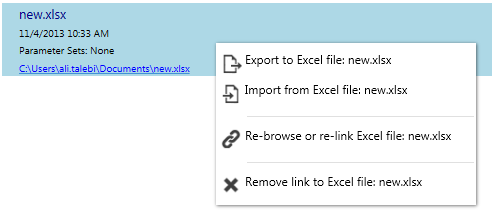
Also the right click menu for each linked Excel file provides quick access to:
•export to,
•update from (import),
•re-browse to a new Excel file location (e.g. if the file is missing because the directory structures changed)
•or unlink that Excel file.
2.Define a Parameter set to export
A Parameter Set is collection of information that is used to export data from Revit model to Excel file.
The 'Parameter Set' describes:
•the export location in Excel,
•a list of source elements from Revit model,
•a list of parameters that will be exported to Excel.
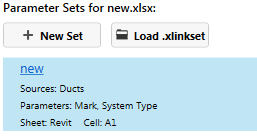
Click the 'New Set' button to create a set.
![]()
Each linked Excel file can have multiple Parameter Sets, each of which will be exported to a different sheet in Excel.
Hovering over each parameter set in list reveals the following actions:
•edit parameter set
•import
•export
•save parameter set to an .xlinkset file
•remove parameter set from link definition
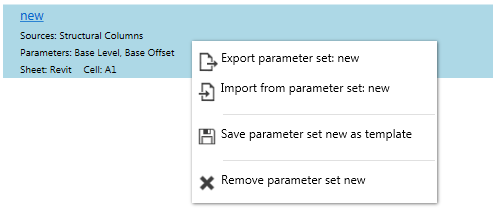
![]()
Also the right click menu for each Parameter set offer quick access to actions for that set.
3.Parameter set options
You can set the options for a parameter set.

You need to specify where in Excel file the Revit data will reside. Each parameter set will have its own Export Location.
You need to specify both the Excel sheet and cell. If the sheet does not exist in the Excel file, it will be created during first export. The cell value must be in the format of “row, column” where the minimum value is 1.
Export to Excel when project is saved - Enable this option to auto update exported data when the Revit project is saved.
Update Revit from Excel when project is opened - Enable this option to auto update Revit model from data in Excel when Revit project is opened.
4.Specify the source elements
You can select the source elements to be either from Category or Symbol (Type). Only categories and symbols used in the Revit model will be listed here.
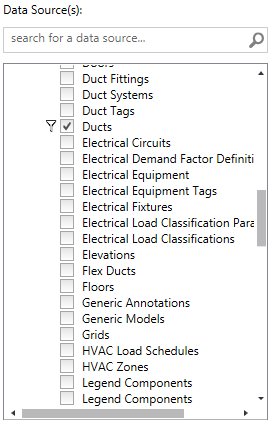
To select the source element, check on the box next to the category or symbol name.
You can mix the selection between category and symbol.
Warning: Selecting the 'all categories' or 'all symbols' check box will cause the ExcelLink to try build a list of all parameters in the model, this will take a long time!
5.Specify the parameters to export
Once you have selected the list of source elements, list of available parameters will be displayed. Only the checked parameters will be exported to Excel file.
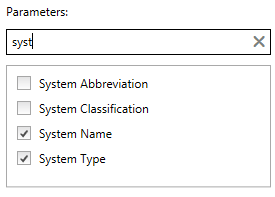
To select parameter, check the box next to parameter name.
Parameters displayed in red are a 'type parameter'. These can be exported to Excel but any changes made to the value in Excel will not be imported.
If you select multiple different elements, it will list all the possible parameters to export. When the parameter does not exist for a particular element, it will be an empty value.
6.Exports the parameters
You can select either to export a selected Parameter Set using export button:

or a specific Excel file:

or all linked Excel files:
![]()
When all the data has been exported, you will be notified in the status bar.
![]()
Important:
Every time data exported to Excel, it will overrides any values in the targeted export location.
Example of exported data to Excel
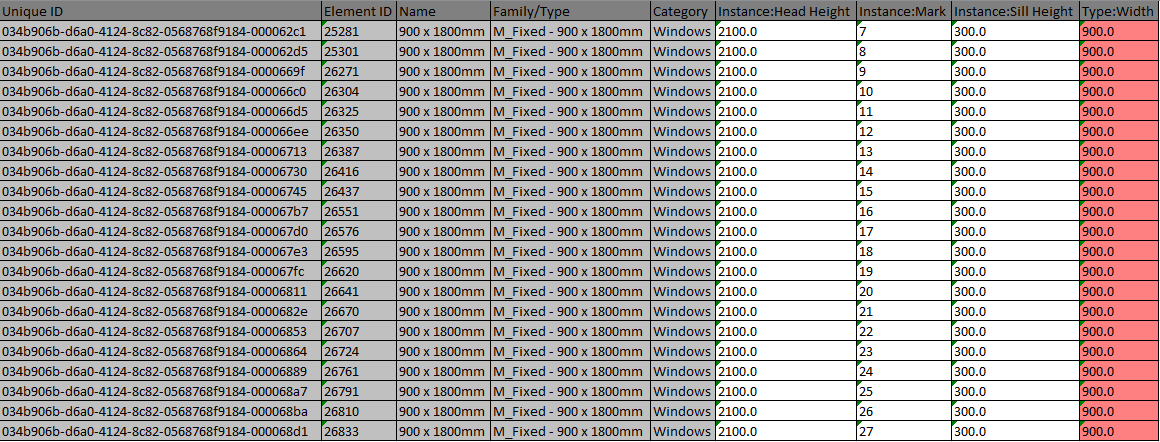
Gray background represents read-only data. These cannot be changed in Revit or in Excel.
Red background represents element family/type level data. These can only be changed via the Family Editor in Revit. It cannot be changed on a family instance, and will be ignored when updating Revit from Excel.
White background represents element instance data. These values can be changed in Excel and the new values will be updated in Revit.
Direct link to this topic:
© 2015 Arup