Create Drawing |
  
|
Create Drawing |
|
The CADtools “Creating Sheet” tool will:
Create a sheet model in the same file as the “Mock Border” the default name is “Sheet 1”
Set up the sheet to the correct size to be used when the drawing is printed.
Attaches the “TitleBlock” as a reference file.
Attaches the “Default Model” as a reference file.
Inserts a cell that contains the “TitleBlock” text.
Populates the “TitleBlock”s text with values defined in the ProjectSettings.txt file or the excel spreadsheet.
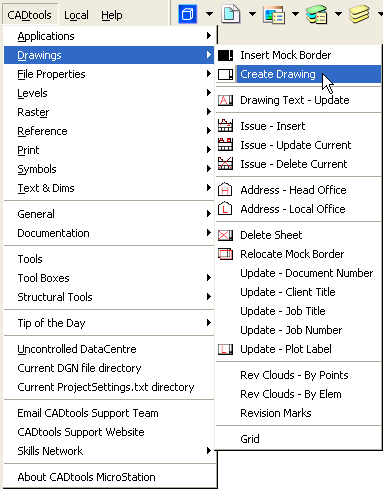
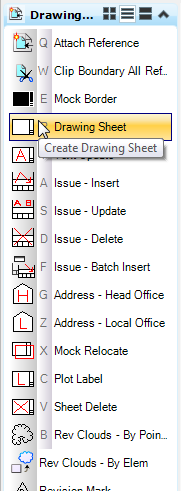
The CADtools "Create Drawing Sheet" tool can be started by selecting “Drawing Sheet” from the CADtools> Drawings menu as shown below left or selecting "Drawing Sheet" from the "Drawing Setup" tasks as shown below right.
The "CADtools - Drawing Text" dialog box will appear as shown below.
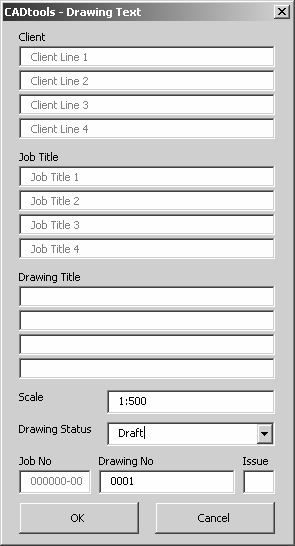
At this point the user can enter title information and other information unique to that drawing.
Notes:
•Fields that are greyed out are automatically populated from the ProjectSettings.txt file.
•None of the information has to be inserted at this point; it is possible to update this information later by using Drawing Text - Update tool.
•It is very important that this method is used to create drawings, so that CADtools batch tools can be used to make changes to drawings at a later date.
•If the Project has been set up to use a spreadsheet to update the TitleBlock information the CADtools – Drawing Text Dialog will not be displayed .
•The Microstation Edit Tags Dialog should not be used to edit Tags Manually, as the CADtools Scripts Writes Information to the file that gets used by other CADtools tools.
Direct link to this topic:
© 2013 Arup